Adding memory to your Nook is fairly easy, and requires no tools.
A lot of people have been coming to WritAnon, trying to find instructions on how to add memory to Barnes & Noble’s Nook. This is mostly because I said adding memory was simple in one of my previous reviews of the Nook.
While the blog at WritAnon isn’t generally a technical blog, adding memory to a Nook is fairly easy, and it makes sense that writers would need to upgrade their Nooks.
The hardest part with upgrading your Nook’s memory is just getting started. The whole procedure should only take a few minutes.
Step 1: Bookmark this blog entry
If you haven’t already done step 2, you’ll likely need to bookmark this page so you can come back to it. If you have, you may still find a reason to come back, or send the instructions to a friend at a later time.
While you’re at it, consider subscribing to our RSS feed to find out more about writing for a living and pleasure. There is at least one post every week.
Step 2: Buy a MicroSD expansion card
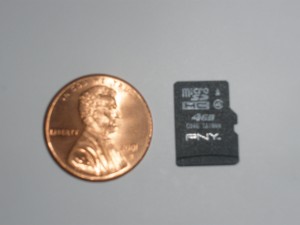
In order to do this upgrade, you’ll need a MicroSD card. I used a 4GB card made by PNY, but I’m fairly certain that virtually all of them are the same, just with a different name stamped on the cover.
MicroSD cards are very small…they can fit entirely on the surface of a penny.
If you don’t have a MicroSD card, you may want to purchase one. I’ve linked to a few different types below. Disclaimer: I get a few cents for each card purchased through these links, so this is a good way to thank me for the information included in this entry.
Step 3: Turn off your Nook
You’ll need to make sure your Nook is powered off all the way. You can do this by holding your power button (the silver button on the top of the Nook) for approximately 5 to 7 seconds.
Step 4: Pull off the back cover
Taking the back off of your Nook takes a bit of work, but it comes apart without the need for any tools.
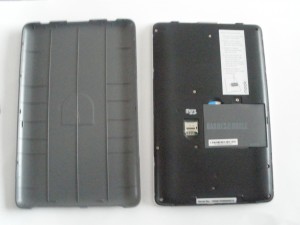
If you look carefully at the side, you’ll notice a small thin gap, just large enough to put a fingernail in. If this is your first time opening up the back of your Nook, the safest bet is to place the Nook firmly against a soft surface as you pull the back cover off. This will take a fair amount of force, so be careful not to lift the Nook off of the surface.
Once you get the back cover off, you should see something like this:
From here on out, the steps are actually pretty easy.
Step 5: Lift the memory card cover
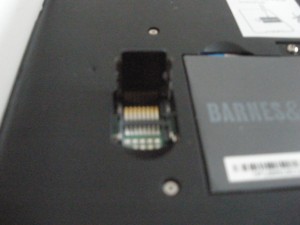
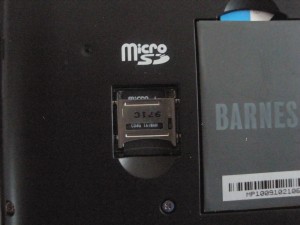
Once the back cover is off, you’ll see two things: the battery (the larger rectangle with the screw holding it down) and the memory card expansion slot. You should lift the cover as shown below.
You’ll see the electronics underneath are exposed so you can insert your MicroSD card.
Step 6: Insert your MicroSD memory card
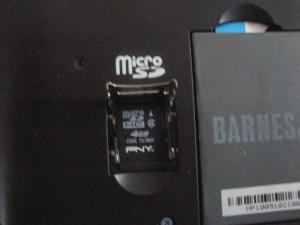
This sounds like more work than it is. All you have to do is lay the card so that the gold contacts on the card match the gold contacts on the Nook.
When you’re done with this, the installed card should look something like this (the cover is still open in this picture):
The card should lay flat and smooth, resting in the notches built into the card.
Step 7: Close the memory card cover
Assuming that the card was laying flat, this should take very little effort. There will be a very slight snap when the cover is in place, but unless your hearing is excellent, you probably won’t hear it.
Now the hard part is over, and you could test the new card now, if you wanted. However, since there’s a small chance you could bump the back cover and cause the memory card to fall out, you should proceed on to the next step.
Step 8: Replace the back cover
Make sure that you line up the cover correctly (the grooves for the power button are what I used), then snap the cover back on.
Step 9: Power on the nook, then go into the settings menu
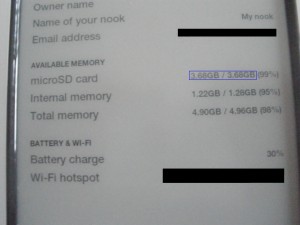
When you enter the settings menu, you should see your new microSD card show up in the available memory.
Now you’re ready to use your additional memory to store new pictures, songs, or, of course, more books.
Did you find this article helpful? Please leave a comment expressing your thanks below!



 Need a website?